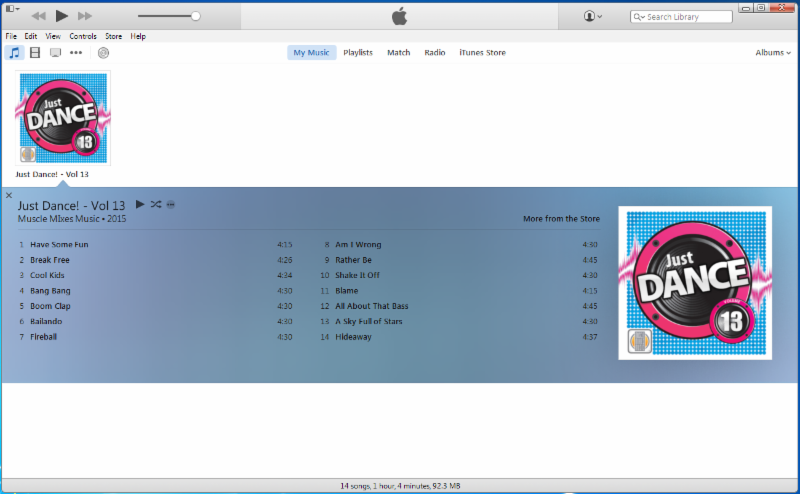
HOW TO DOWNLOAD YOUR MUSIC FILE.
FOR PC USERS:
All downloadable products MUST be downloaded to a desktop or laptop computer first. These products cannot be downloaded directly onto mobile devices at this time.
System Requirements:
- Computer (desktop or laptop)
- iTunes (available for download here) or another media player
- Web Browser
- Unizipping program or functionality on your computer
*This demonstration was done using Windows 7 and a Google Chrome web browser.*
(Mac users click here for help)
1. CHECK YOUR EMAIL. After placing an order, you will receive 1 email from Muscle Mixes Music with the subject "Your Muscle Mixes Music Order Confirmation".

2. DOWNLOAD KEY EMAIL. Inside the email, click on the Download Files link. You will be redirected to your account on our web page where the album is available for download. Scroll below the image of the album and find the .zip file to download.

3. DOWNLOAD MUSIC. Click on the file name in order to begin the download process. (In the example below the file name is: A Tribute To The Jacksons.zip 55.36 MB)

4. BEGINNING DOWNLOAD PROCESS. The music folder will automatically start the download process.
**On some computers, you will be given the option to "Open" or "Save" before the download will begin. In this case, click "Open".**

5. OPENING THE DOWNLOADED FOLDER. Wait for the download to completely finish. On the right of the downloaded file, click on the small arrow. This will open a pop up menu, click "Open".

6. UNZIPPING THE FOLDER. Once the folder opens, click on the "Extract All Files" button.

7. SELECTING A DESTINATION. In order to extract/unzip the folder, you must select a destination. Click "Browse".

8. SELECTING A DESTINATION(2). When the 'Select a Destination' window opens, make sure "Desktop" is selected. Then, click "OK".

9. EXTRACTING THE FILES. Now that you have selected the destination, click "Extract".

10. MUSIC FILE APPEARS ON DESKTOP. The new, unzipped folder is now visible on your Desktop. You can now use this unzipped folder to add to your music player or burn a CD.
**You may also see a '_MACOSX' folder. This can be deleted.**

HOW TO IMPORT YOUR MUSIC INTO ITUNES.
OPTION 1:
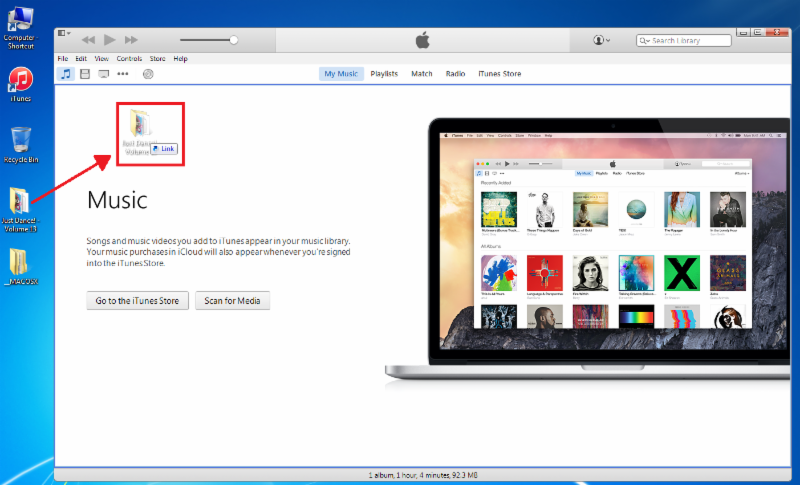
1. DRAG & DROP MUSIC FOLDER. Locate and click on the music folder on your desktop. While still clicking on the folder, drag the folder over into your iTunes screen and unclick.
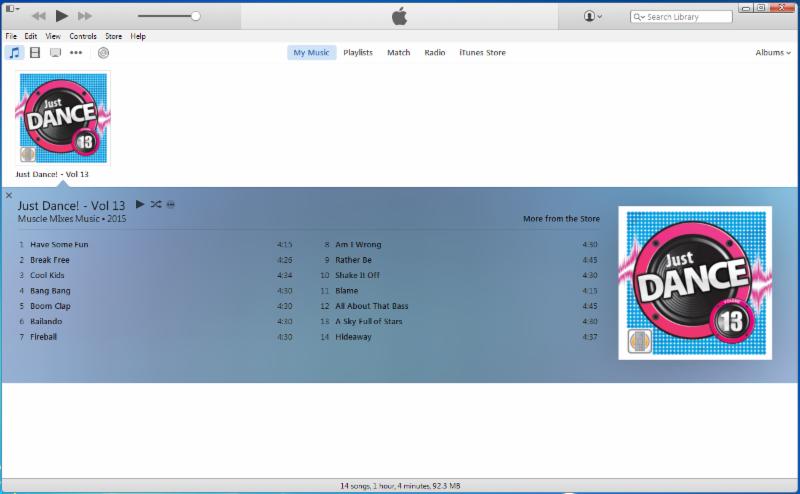
2. THAT'S IT! You will now be able to locate your new music in your iTunes program.
OPTION 2:
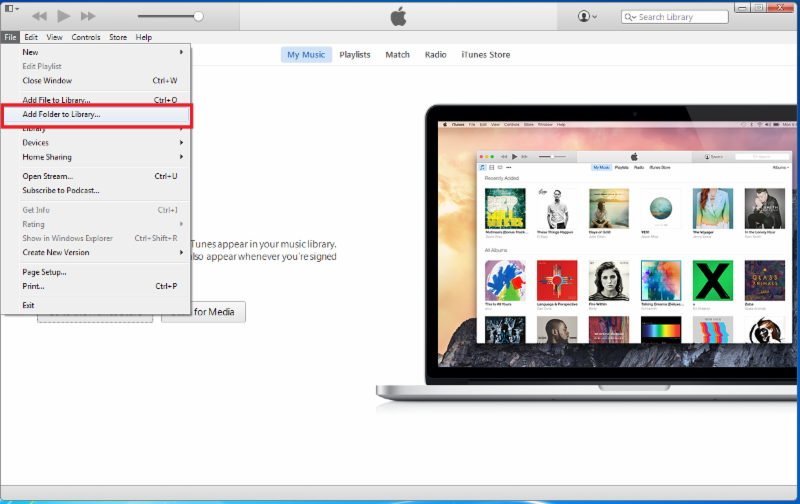
1. SELECTING THE FOLDER. In the upper left corner of the iTunes program, select "File" from the menu bar.
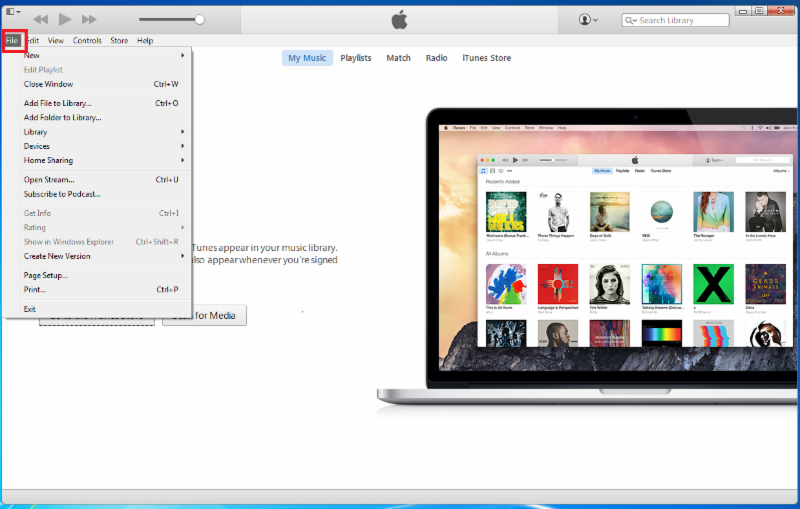
2. SELECTING THE FOLDER(2). Under the 'File' dropdown menu, select "Add Folder to Library". A pop up window will appear.
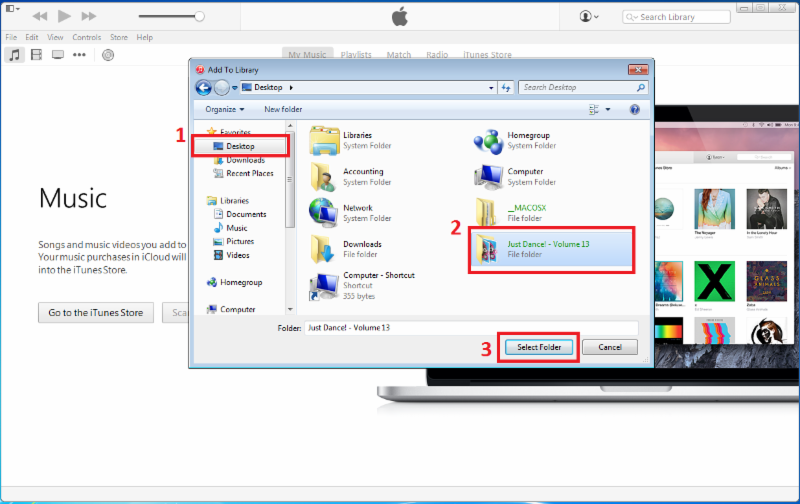
3. ADDING FOLDER TO LIBRARY. In the 'Add to Library' pop up window, (1) make sure your Desktop is selected. (2) Locate and select the unzipped music folder. (3) Click on the "Select Folder" button.
4. THAT'S IT! You will now be able to locate your new music in your iTunes program.
